
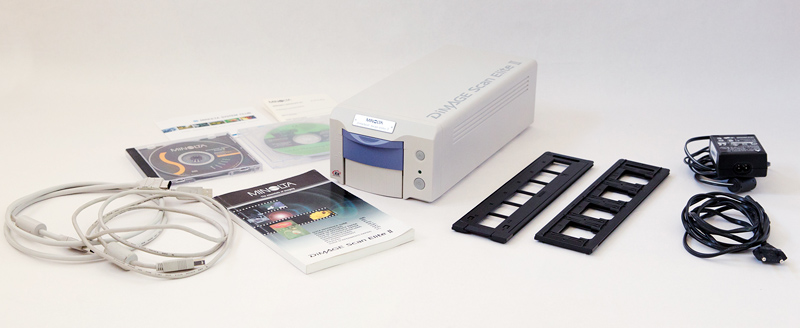
APRIL 2025 – A Minolta DiMAGE Scan Elite II film scanner. Photo © by Mark Zanzig/zanzig.com
A Solid Tool for Film Scanning Enthusiasts
The other day I did a bit of spring cleaning, and I stumbled upon the box containing my Minolta DiMAGE Scan Elite II scanner. I thought this might be a good time to write a review. Wait! Why would anyone review a 23 year old scanner? And why would anyone read a review of such a scanner? The simple and short answer is: because it is a very good an excellent scanner that still works well (for me, that is.) I guess there must be thousands of people with countless negatives and slides sitting in their archives who wonder how to transfer them to the digital world in a decent quality. A second-hand purchase of this device might be the answer.
But first things first.
I purchased the scanner in October 2002 which set me back 729 Euros – a heavy price tag. Petra and I had just returned from our trip to Canada with 40+ rolls of slide film, and I wanted to get high-quality, high-resolution scans from those slides. But for such volumes I did not want to use the expensive Kodak PhotoCD service offered by my preferred lab. I also intended to scan my back catalog of slides and negatives over time. So I did some research and picked this scanner because it had (almost) exactly the features I was looking for.
Here is a table showing my requirements, and how the scanner supported each requirement at the time of purchase.
| Requirement | Minolta DiMAGE Scan Elite II |
|---|---|
| Dedicated Film Scanner | Yes. Designed to support films, specifically the 35 mm films I was using. No support for larger formats. |
| Supports positive and negative films | Yes. Supports positive and negative films, both in color and b&w with decent previews. |
| Supports slide frames and film strips | Yes. Comes with one tray for up to 4 framed 35 mm slides and one tray for 35 mm film strips with up to 6 images. An optional APS-C feeder is available. |
| Automatic feeder for large batch jobs | No. Maximum load is four framed slides or six images on film strip at a time. Trays need to be fed manually. |
| High optical resolution | Yes. Optical resolution up to 2820 dpi, which is good for up to 4032 x 2866 pixels or roughly 10.8 Megapixel. |
| High scan quality | Yes. The scanner received good reviews upon launch and convinced me from day one. Even in 2025, the scan quality usually beats my film-enabled EPSON Perfection 4870 Photo flatbed scanner. |
| Sufficiently fast | Yes. A full-size high-resolution scan takes about 2 minutes and 15 seconds, i.e. a full slide tray (of four slides) typically takes under 10 minutes to complete. |
| Full manual control over each scan | Yes. While the scanner offers several automatic functions the user can control almost everything about the scan, from color calibration and file formats to focus setting and multi-sampling. |
| Several automated features | Yes. + Auto focus + Auto exposure + Digital ICE™ (removal of dust and scratches) + Digital ROC™ (recovery of faded colors) + Digital GEM™ (reduction of film grain) |
What’s more, I was intrigued by the simplistic beauty of the scanner which is entirely focused on 35 mm film. Even the product designers had this primary use case in mind when they created the design. The frontal view reveals that the width to height ratio of the scanner is almost exactly 3:2 – the aspect ratio of a typical image captured on 35 mm film. 🙂

Enough of my wishlist. Let’s take a look at a few actual images.
Sample Scans
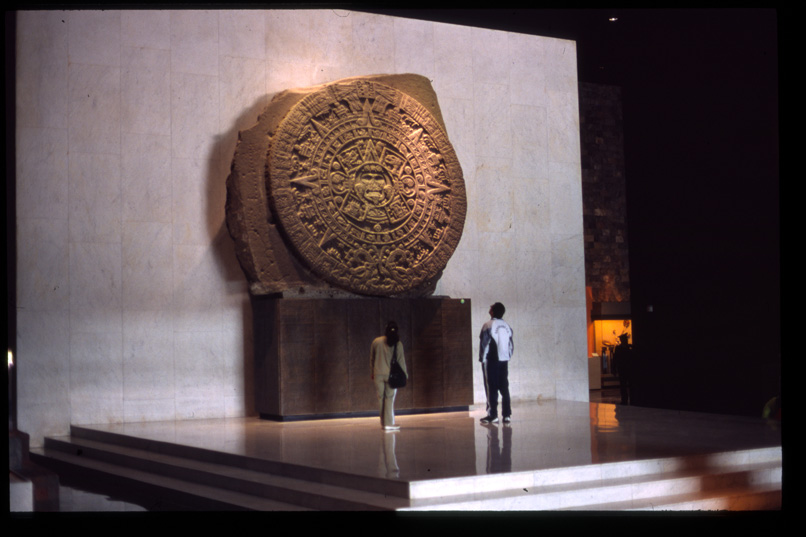
Here are some sample images I scanned for this review in April 2025. They are superb! It’s as simple as that. I was stunned by the fact that the digital versions right out of the scanner were so close to the visual impression of the original slides, with just auto focus and auto exposure switched on. (More about some of the fancy additional features below.) The scans were almost usable right away. Please note that I just reduced their size but have not altered them in any other way, not even sharpened.


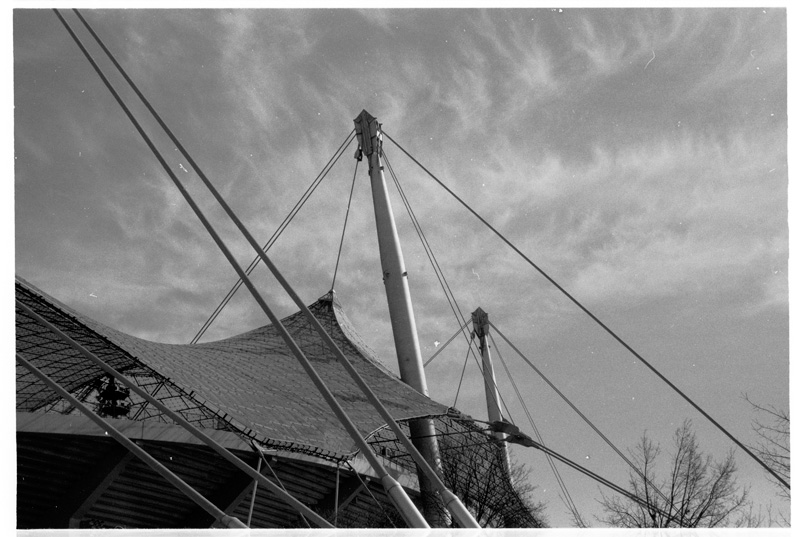
I was even more impressed by the scans of the black and white negatives. I shot these last year with a Kodak Retinette 1B (Type 045), so I did not expect highest quality at all. But I got it.

This is all nice and fine. But let’s do a closer look at one specific image.
Meet Image 13-307
For this review, I did a whole bunch of fresh scans of slide # 13-307 from my archive. The image shows Peyto Lake in the Banff National Park in Alberta, Canada. Captured on 23rd August 2002, a beautiful summer day, with my trusted Canon AE-1 Program body on a Fuji Sensia 100 slide film. The framed slide looks in 2025 as impressive as it looked in 2002 when it was returned from the lab.
All following versions of image 13-307 have not been edited, i.e. they show the scan file as created by the scanner. The only changes I made in Photoshop were:
- Reduce the bit-depth from 16 bits to 8 bits
- Reduce the size to 806×537 pixels (i.e., 20% per dimension)
- Save as JPEG with a quality setting of “10”
OK, here we go.
1. Neutral Scan
Let’s start with the neutral scan. Just auto focus and auto exposure were activated, and none of the fancy features.

This scan looks stunningly similar to the original slide, both in Photoshop and Windows 11 Photo Preview. The software seems to have nailed the colors and overall exposure very well. Of course, the web image does not show the details. For your convenience, here’s a ZIP file of the high-resolution image as it came from the scanner.
2. Digital ICE™ – Dust & Scratch Removal
I’ve spent countless hours in my life removing dust and scratches from scans, and the automatic removal of dust and scratches can be a powerful time saver.
The Digital ICE™ function comes to rescue by making an additional infrared scan that helps the software to identify objects and damages on the film surface. With this information the respective portions can be replaced automatically, probably by averaging the surroundings of the missing pixels. This can have some unwanted effects, though, especially when the objects are bigger or cover unusual patterens in the image. Obviously, the software does not know what kind of pattern to insert and can fail.
It’s a great feature for large sections with a single color like backgrounds, skies, walls, or surfaces. Having said that, it may not be the perfect choice for final high-end scans (which you will want to gently edit manually by yourself). For creating previews, e.g. to enable editors make their selection, it is perfect.
Here’s the image, with auto focus, auto exposure, and Digital ICE™ activated.

Even in the web image you can already see that the dust particles have been removed without affecting the overall visual impression (in terms of color and exposure.) However, if you look very closely, you may notice a minimal blur. This is confirmed by a direct comparison:


3. Digital ROC™ – Color Recovery
I applied the Digital ROC™ technology on a couple of scans but it did not yield positive results for those scans. Image 13-307 is a good example. It now shows warmer colors across the board. But the original slide did not show any faded colors and did not call for color recovery, so I think 13-307 was not a good test candidate for Digital ROC™ in the first place.

4. Digital GEM™ – Film grain reduction
Most 35 mm films show some grain, especially “fast” 400 ASA films. 100 ASA films seem to be less affected. The Digital GEM™ function promises to remove such grain, and indeed, the scan with the function enabled shows that the film grain is gone, probably by slightly blurring each pixel with its neighbors. This slightly softens the image and removes finest details visible in the neutral scan. The effect is not huge by any means but when you look closely you can see it.
What’s more, I noticed that the bright white areas – for example the snow covered mountains – appear in light pink now. Huh? This one is a biggie for me, but I could fix it for this slide by altering the saturation (-80) and brightness (+30) of magenta tones in Photoshop. With this change, the image looks as good as the neutral one just with less grain.


I also did scans of the remaining combinations of Digital ICE™, Digital ROC™, and Digital GEM™. These scans just showed the combined effect of the features – e.g., dust and grain removal – but no significant changes or additions to the findings above.
Just for the sake of it, here’s my final edit of slide 13-307. I started with the neutral scan, manually removed dust and scratches, gently adjusted saturation and brightness, and applied a bit of sharpening. Lovely. 🙂

The Scan Software
With all this excitement about the scanner, there is a grain of salt in this review. It is – as probably to be expected – the scan software.
You see, the scanner and software were developed around the year 2000 and commercially launched in October 2001. Since then, the world has changed. A lot. Back then, Windows 98/98 SE/2000/ME/XP were the common operating systems, and MacOS 8.6 – 9.2. And Minolta was still a solid, independent company.
Change came fast. Already in 2003, Minolta merged with Konica to form Konica Minolta. Most parts of their camera and photo business were closed in 2006; just some parts of the camera business were sold to Sony. For users it became increasingly difficult to obtain updates for the scan software. While operating systems changed and became more powerful, the scan software remained on its 2006 level.
I kept using the scanner and software for many years until I got a new computer with Windows 10. When I tried to install the latest original software I had on file (version 1.1.5 from 2007), it did not find the scanner, despite the scanner being powered on, plugged in properly, and recognized by Windows. The application simply refused to start. I did not bother too much looking for a fix. The scanner went into its box for the next couple of years.
And I forgot about it until I re-discovered the box.

In the meantime I had upgraded to a new PC with Windows 11. Curious as I am I tried to install the scanner with the original software. Frankly, I did not have high hopes and expected a failure like years before. Imagine the surprise when the application launched and showed the familiar scan dashboard. Hoo-rah!
I could do the scans for this review, and some more but experienced a few hickups. Some batch scans stopped in the middle of the scan and did not recover. As the scanner was generally able to create nice scans, I blame the software and the Windows 11 environment for the issues.
Closing the app and restarting computer and scanner solved the issue for a while. However, this is not a feasible work-around. When I just ran the scan software without any other apps in the background, basically leaving the PC alone, the batch scans were properly executed. I guess the old software just dislikes other active applications.
My research for this post triggered my interest in getting the scanner to work on my old computer as well, and I succeeded! I’ve summarized the process in this comprehensive Guide for setting up Minolta DiMAGE Scan Elite II in Windows 10. I would be delighted if the guide helps you saving this scanner from the bin. (If they do, please feel free to leave a comment below.)
By the way, the official support page by Konika Minolta is still around. It offers some useful information as well as the most recent drivers and software releases for Windows and Mac.
Update March 2026: The official support page for the scanner I had previously linked has been taken offline in February 2026, and it has become a bit more difficult to find the most recent drivers and software for Windows and Mac. But it still available! A Google search for ‘dimage scan elite ii windows 10 software download’ returned good results, including a link to this page. At the top you can select a product. Pick ‘DIMAGE SCAN ELITE II’ and you will see a number of results covering both Windows and Mac, as well as various languages! For your convenience, here is the link for the English Windows version.
Conclusion
The Minolta DiMAGE Scan Elite II is an excellent film scanner and provides high quality scans and an enjoyable experience IF you can get the original software to work. The image quality is good enough for scanning 35 mm consumer films of the past. I doubt that there are much more details in such slides and negatives, and a net image size of roughly 10 Megapixels is sufficient even for larger prints. (This is true for 100 ASA films; at 400 ASA you will get clearly visible film grain, and the high resolution won’t help uncovering the image details. These will remain hidden in the film grain forever.)
On my site you will find several images made with the Minolta DiMAGE Scan Elite II.
Enjoy!
P.S.: Here is another review of this scanner by the friendly folks and scanning experts at filmscanner.info (in German.)
Digital ICE, Digital ROC, and Digital GEM are trademarks of Eastman Kodak Company. All corporate and product names are the trademarks and registered trademarks of their respective companies.

Thank you for such a complete blog article. I have one of these scanners and I have had excellent scans from it using Vuescan. Now I want to put together an old Windows 10 computer (with a firewire card) to try it again using your instructions 🙂.
I found that the scans from my Minolta were better than any of my other scanning methods – camera scans, Plustek 8200 and Epson 4490. There is something about its ability to focus and the native optical resolution which are just right. The USB interface is just too slow but firewire works well.
LikeLike